
How to Get a Free Custom Domain Using GitHub Student Pack, Cloudflare, and Render
[Disclaimer]:
You don’t need to be an expert, but having a basic idea of how domains and DNS work (things like CNAME records, nameservers, and HTTPS) will help you understand why each step matters , not just what to click.
How it started:
I initially deployed my site on Render, which was accessible at:
https://jonsnow-l01g.onrender.com
To prevent Render’s inactivity timeout (15 mins), I used UptimeRobot to periodically ping the deployed endpoint, ensuring the service remains active.It worked fine but let’s be honest, that URL doesn’t exactly scream professional.
So I decided to get a custom domain, and thankfully, I still had my GitHub Student Developer Pack unclaimed :) . I immediately added my student email to GitHub, verified it, and waited.
Yes… waited.

It took almost 4 full days (≈72 hours) for GitHub to approve my student status.
Patience unlocked: free domain 🔓 . GitHub’s student pack offers a free .me domain via Namecheap, so that’s what I went with.
Claiming the Free Domain
Log in to GitHub Education
Connect Namecheap from the Student Pack
Purchasing the Domain (Namecheap):
Get your desired domain name and click
complete order.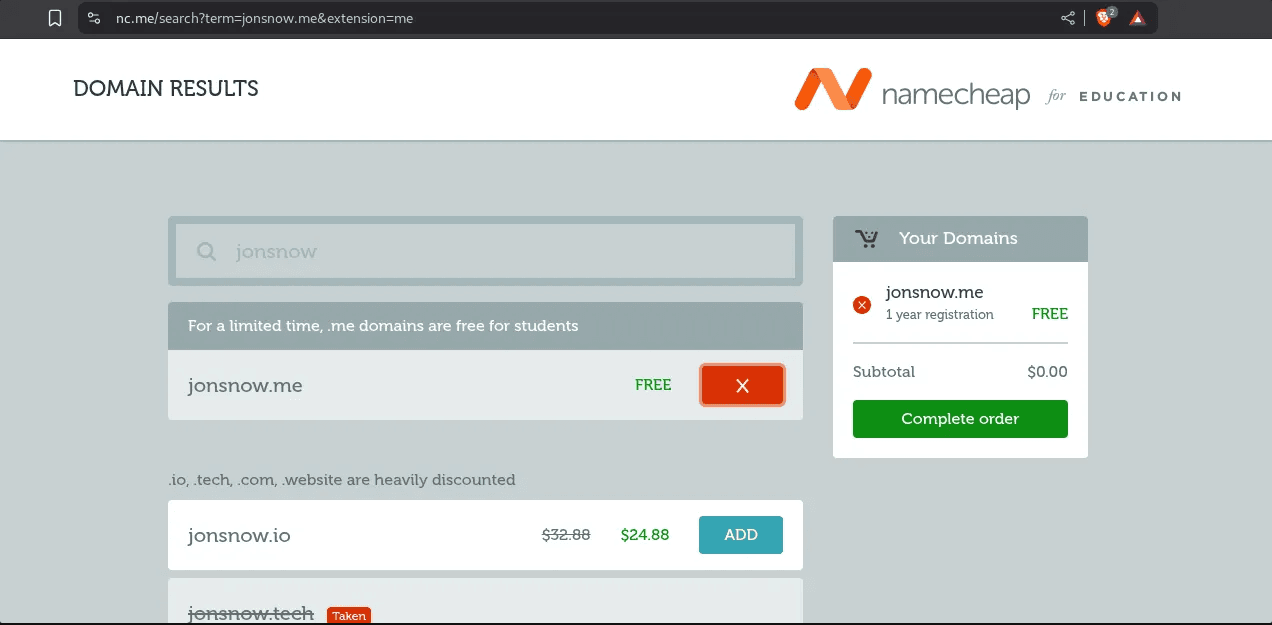
Check
GitHub Pagesonly if you want to host username.github.io on your domain (domain-name.me).Otherwise, leave it unchecked.Then enter your primary GitHub email (use your student email if it is set as primary) and click Finish up.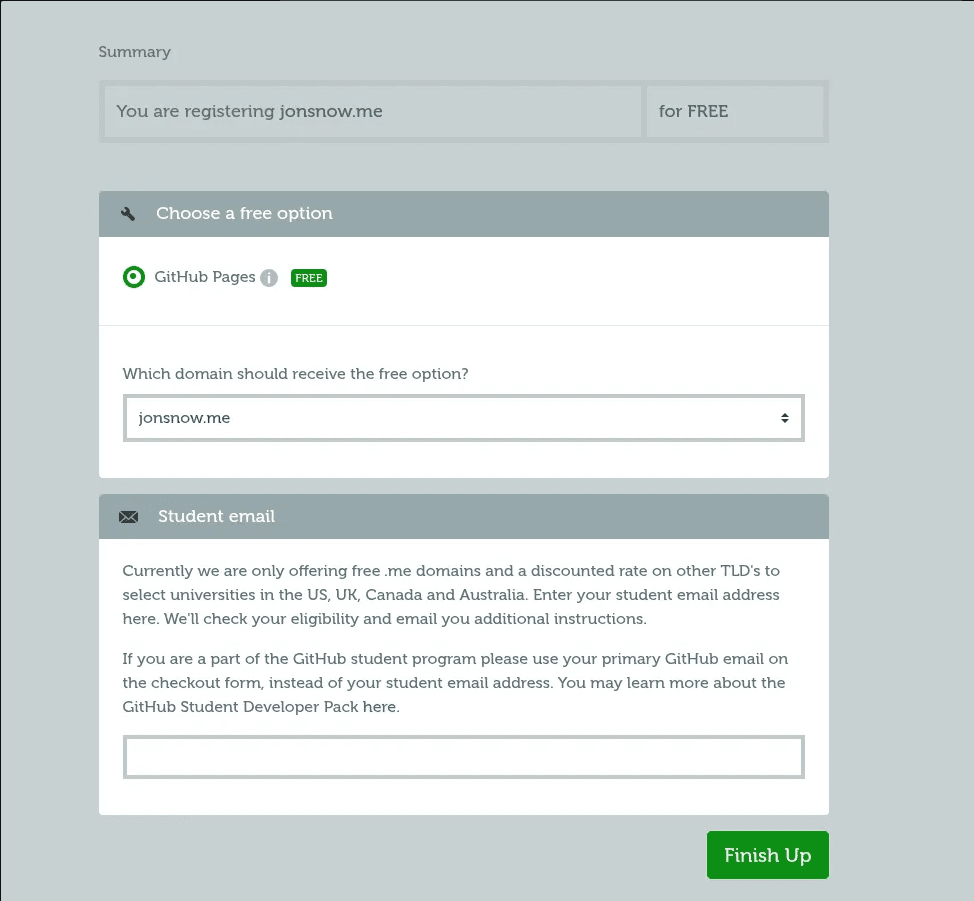
- Then Go to your
namecheap dashboardand check your purchased domain .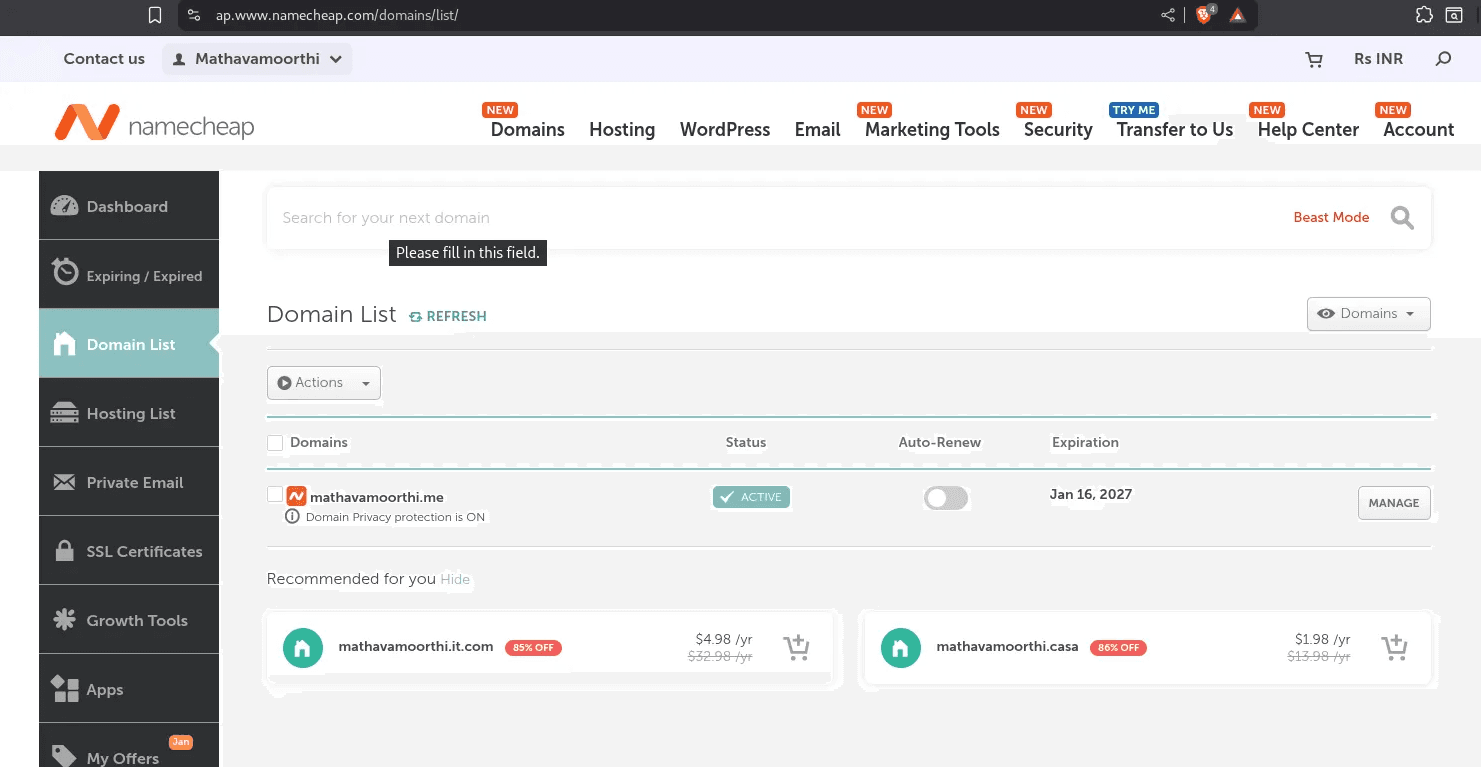
Why I Switched to Cloudflare ?
Now , I thought of using cloudflare as my DNS provider instead of default Namecheap.This is because Cloudflare offers,
- Fast loading
- Free HTTPS on custom domain
- Attack protection (DDoS, bots)
- Render/Vercel/Netlify dynamic hosting ( Namecheap can’t)
- Hide hosting provider IP.
Now , login to your cloudflare account .
Go to
domainin the dashbaordSelect
onboard domainand enter your purchased.medomain name and clickcontinue.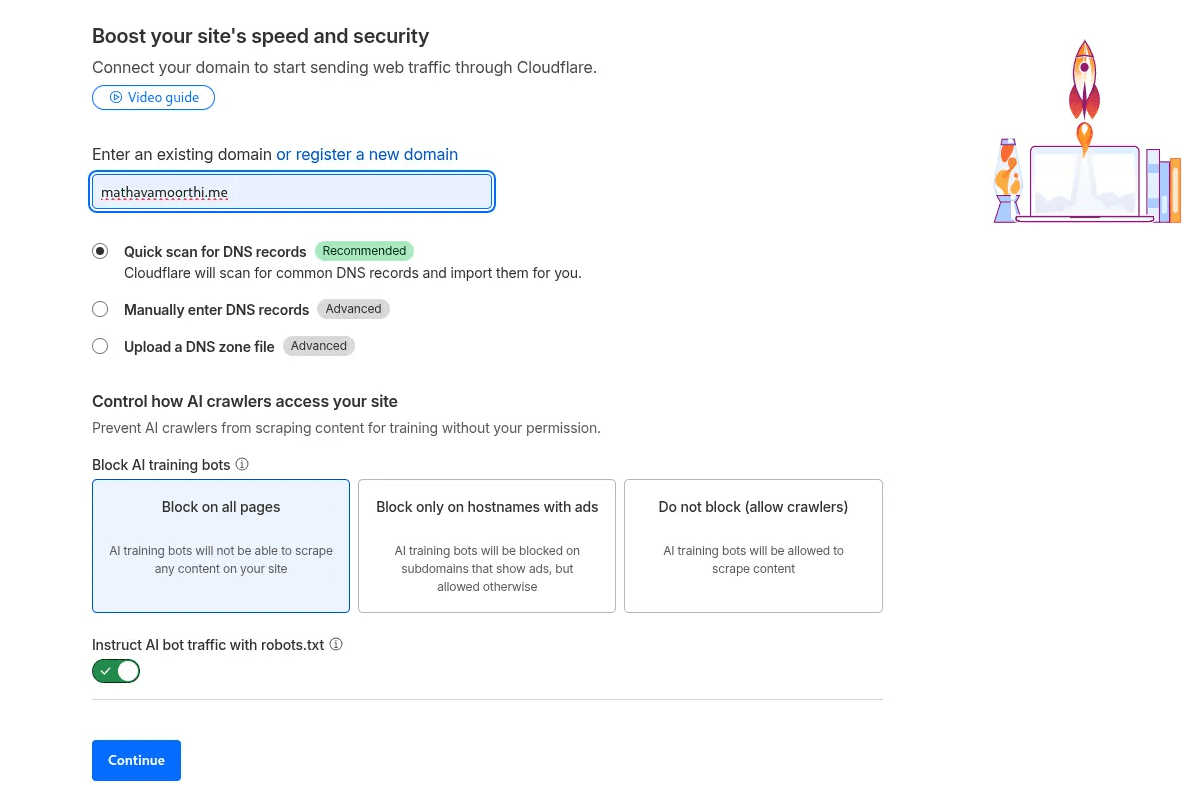
When you add the site, Cloudflare auto-imports Namecheap's default records , delete all those records to avoid conflicts . Especially delete any AAAA (IPv6) records ( Render is IPv4-only).
Next cloudflare gives you two custom
nameservers( e.g1-a.ns.cloudflare.com,1-b.ns.cloudflare.com) .Copy those nameservers , go to Namecheap dashbaord , Domain List → Manage domain → Nameservers section (dropdown) .
Select Custom DNS, Paste Cloudflare's two nameservers.
What happens next ?
Namecheap tells the global .me registry:
"From now on, don't ask me for DNS records anymore , ask Cloudflare's nameservers instead."
This change is registered at the root zone level (the highest level of DNS hierarchy).
After propagation (minutes to hours), every DNS resolver in the world starts asking Cloudflare directly.
In the terminal use ,
dig NS <domain.name.me>to verify the DNS records of NS which was provided by cloudflare.
Connecting the Domain to Render
Go to render dashboard → project → your-service → settings → custom domains
Add your custom domain
domain-name.me, thewww.domain-name.megets added by itself.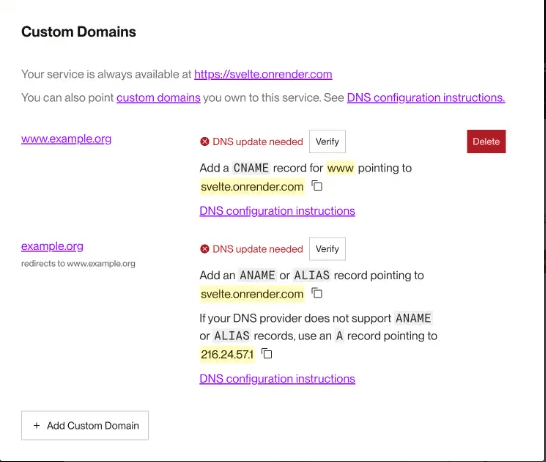
Your domain does not yet point to your service! Next, you'll configure DNS.
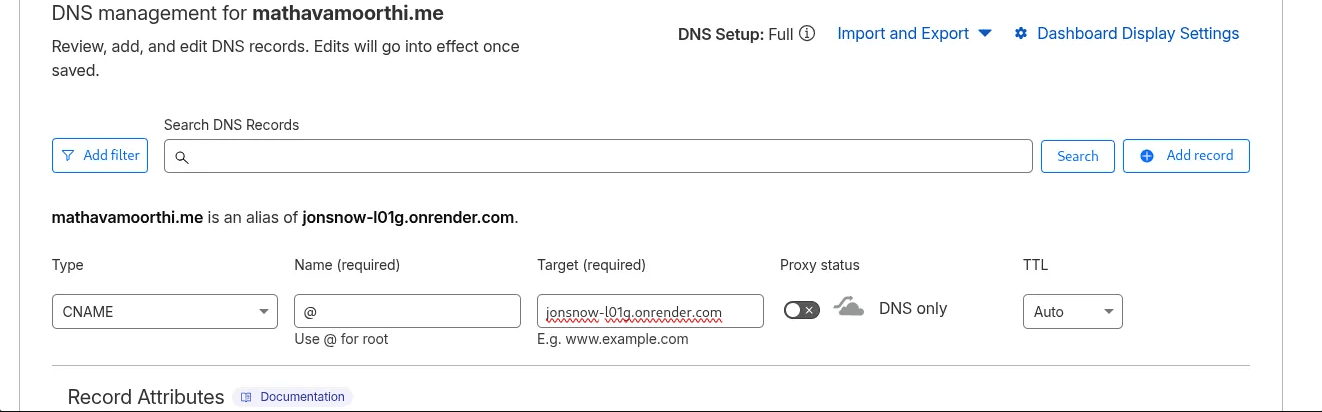
Configuring Cloudflare DNS
Now go to cloudflare dashboard → DNS →Records → Add record
Record 1:
- Type → CNAME
- Name →@ ( @ → targets the domain-name.me )
- Target → render / vercel deployed domain ( without www or https ) ( e.g jonsnow-l01g.onrender.com )
Similary Record 2:
Type → CNAME
Name → www
Target → same as record 1
and most importantly
Set **Proxy status** to **DNS only**for both records. This ensures that requests go to Render instead of Cloudflare, so that we can verify the domain and issue a certificate. After cert issued , turn toproxy.What does this do ?
When someone types domain-name.me:
Their browser asks Cloudflare (via the nameservers).
Cloudflare sees the CNAME → knows to forward traffic to Render.
Because it’s proxied: Cloudflare gives visitors its own IP (not Render’s)
DNS changes might take a few minutes (5-20 mins) but may take longer in rare case to propagate . Once resolved, your domain will point to your Render service. You can verify certificate status in the Render Dashboard under Custom Domains.
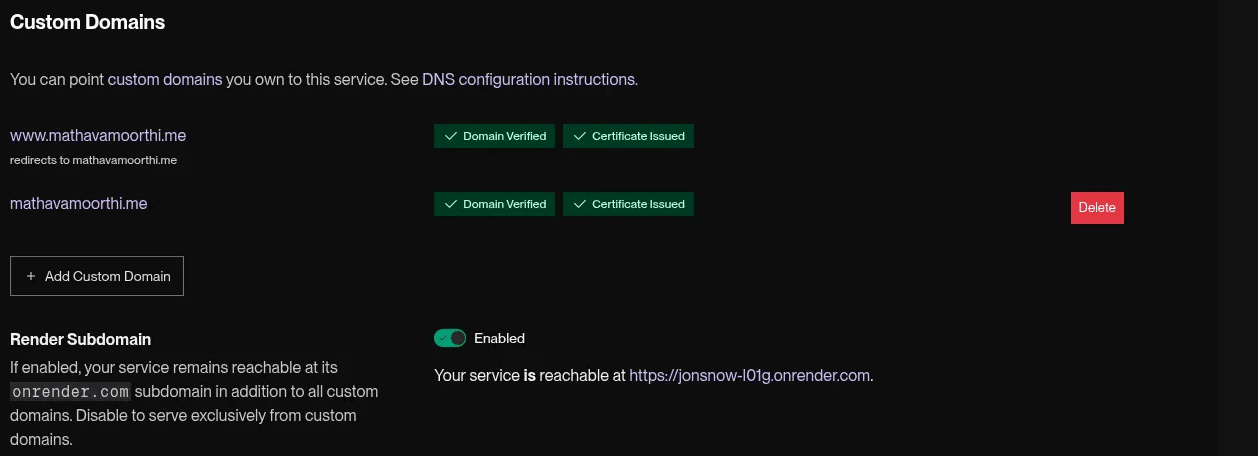
Once Render shows 'Certificate Issued' (green), return to Cloudflare DNS → set both CNAMEs back to Proxied (orange cloud).
Congrats! Your portfolio is now live at https://yourdomain.me — fast, secure, DDoS-protected, with hidden origin IP and free HTTPS.

Complete flow:
- User types
domain-name.mein browser. - Browser asks DNS, "Where is domain-name.me?"
- DNS resolver finds your nameservers (Cloudflare) → asks Cloudflare.
- Cloudflare looks up the CNAME record → sees it points to
render-domain.onrender.com→ forwards the request (proxied). - Request hits Render’s servers.
- Render recognizes the hostname → serves your portfolio.
- Response goes back through Cloudflare → user sees fast, secure page .
You didn’t just buy a domain ,you wired yourself into the internet. Thanks for reading.Bye..
